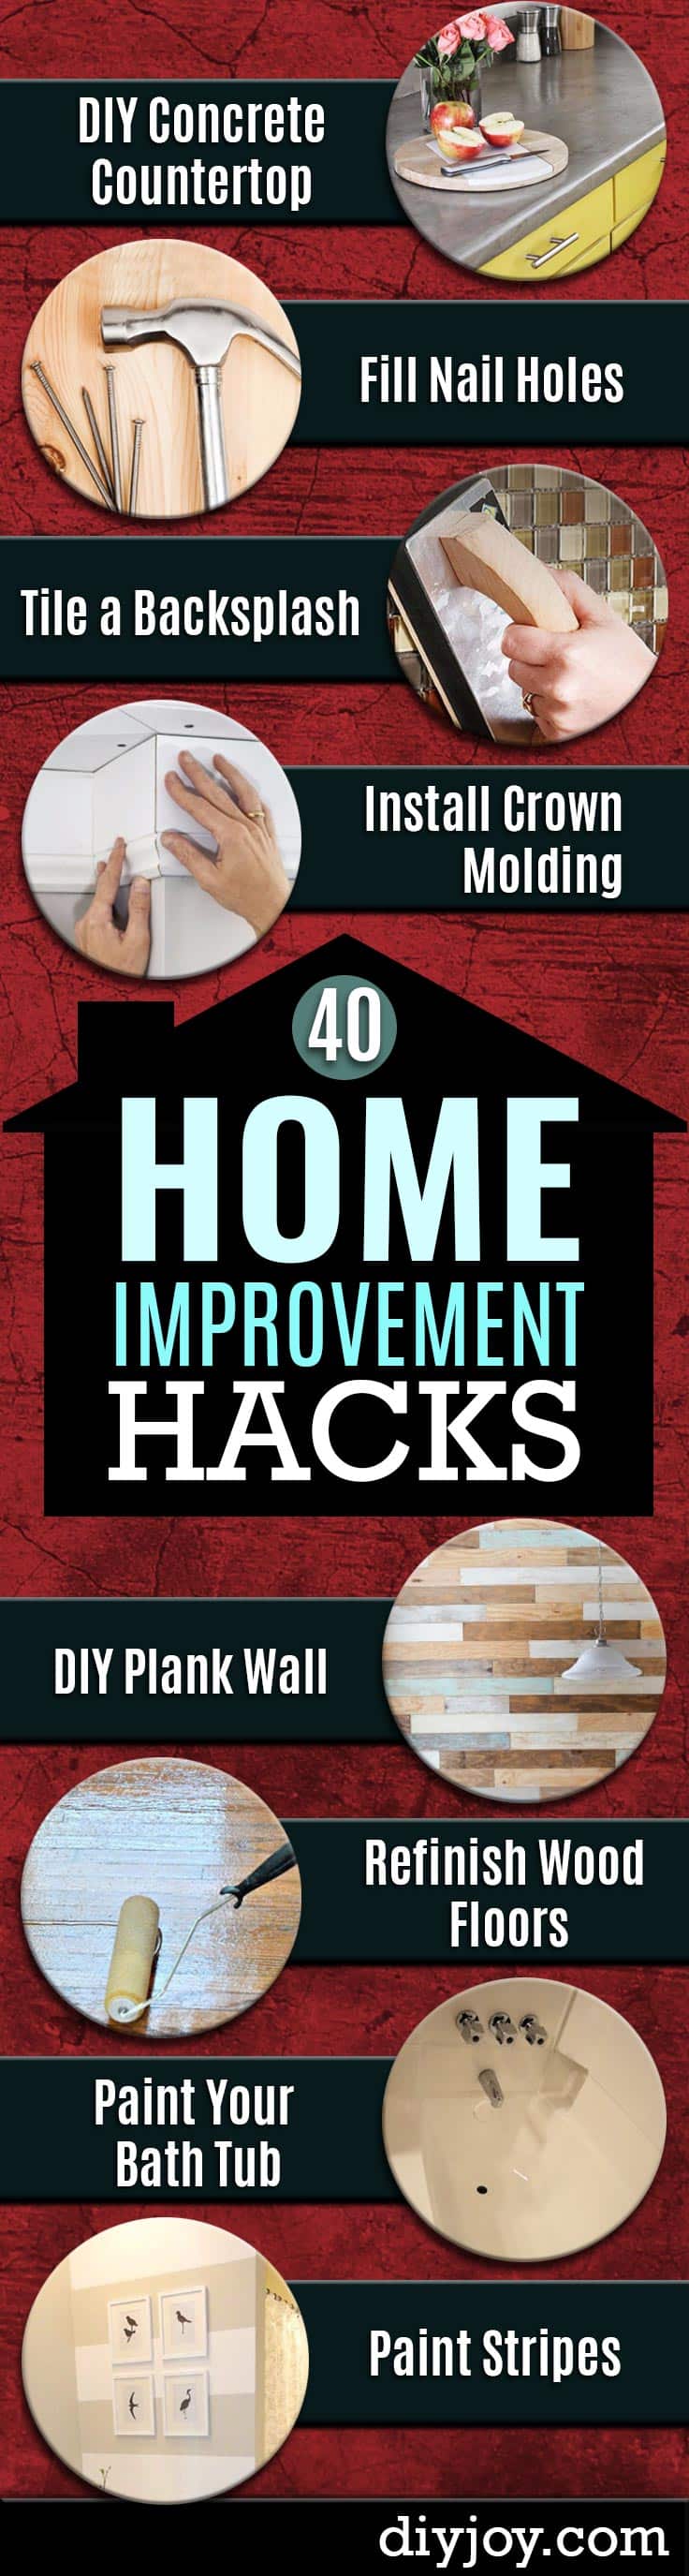
Home improvement hacks are the small, clever fixes that make a house look like you hired help, and these 21 DIY home improvement projects cover just about every room. Think faux tin panels over a dated backsplash, a crayon that hides nail holes, painted stripes on a bathroom wall and a concrete finish troweled right over old laminate. Some take an afternoon, like framing a builder grade mirror or thickening skinny baseboards. Others, like refinishing hardwood floors or hanging and mudding drywall, need a long weekend and a helper. I tucked in my own $12 Roman shade made from a mini blind too, with a full video so you can follow along. Start with the room that bugs you most and pick one project you can finish before Monday.
1. DIY Paint Stripes
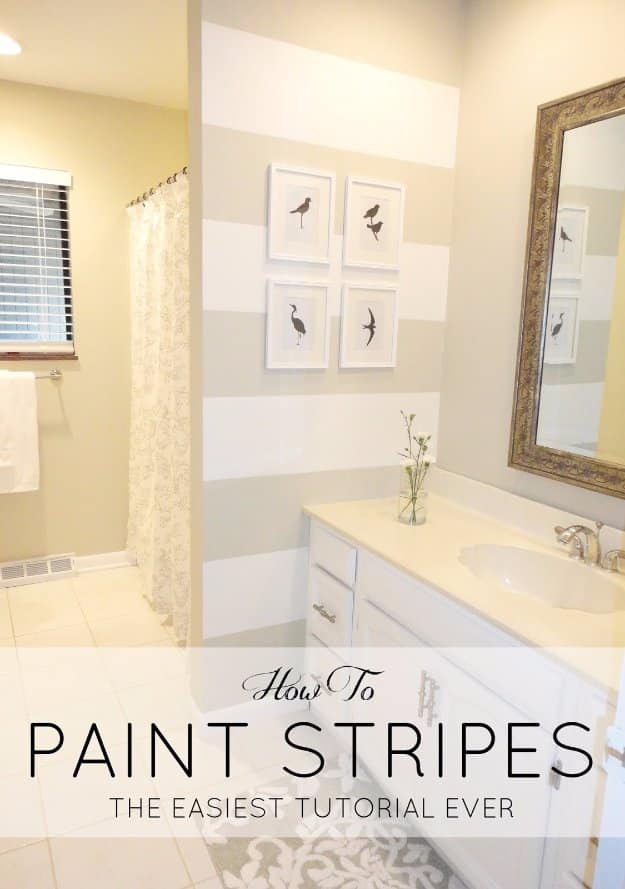
Painted stripes are one of the cheapest ways to make a plain wall look designer, and the math is the only tricky part. Measure the wall height and divide it by the number of stripes you want, so there’s never a skinny half stripe at the ceiling. On this bathroom wall that worked out to 11 inch bands. Tape the lines with a level, then run a credit card along every edge so paint can’t creep under. Roll the accent color on every other stripe and pull the tape while the paint is still wet.
Get the full tutorial at LiveLoveDIY.
2. Install Crown Molding the Easy Way
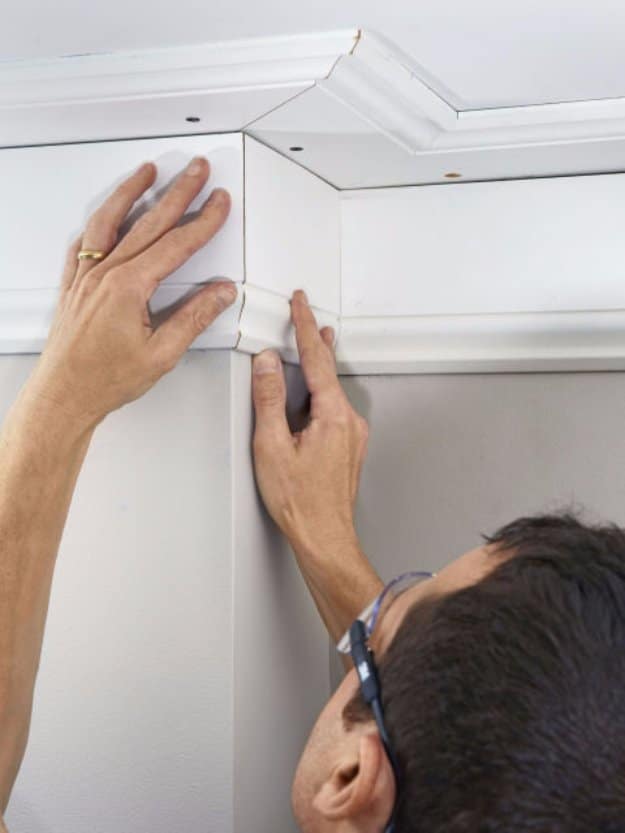
Crown molding gets a lot less stressful when it goes up in layers instead of one big tricky piece. Start with flat baseboard molding nailed straight to the ceiling like a picture frame, then add a second strip on the wall, snug up against it. The angled crown goes on last and nails into both. Cope the inside corners and miter the outside ones. For sizing, figure about half an inch of rise for every foot of ceiling height. MDF molding is affordable and comes in long lengths, so there are fewer seams to fill.
Get the full tutorial at Popular Mechanics.
3. DIY Screen Door Tutorial
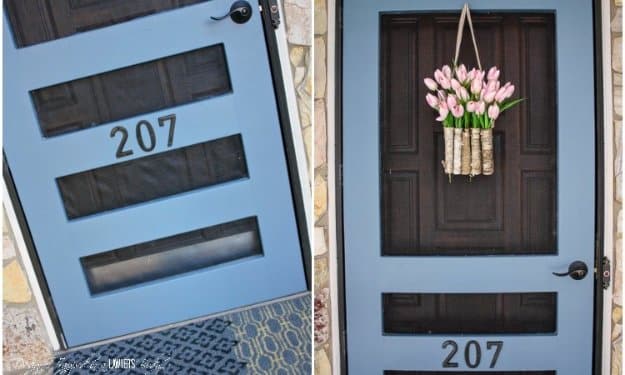
A store bought screen door tends to be either flimsy or ugly, and this DIY screen door is neither. It’s built from 2×6 and 2×8 lumber joined with pocket hole screws, then capped with wood plugs so no screw heads show. Screening is stapled in and finished with screen molding. Measure the door frame first, since every cut length depends on it. Plan on about five hours, and know that this one suits someone with a few woodworking projects already done. Free printable plans come with the tutorial.
Get the full tutorial at Kaleidoscope Living.
4. Cover an Ugly Backsplash
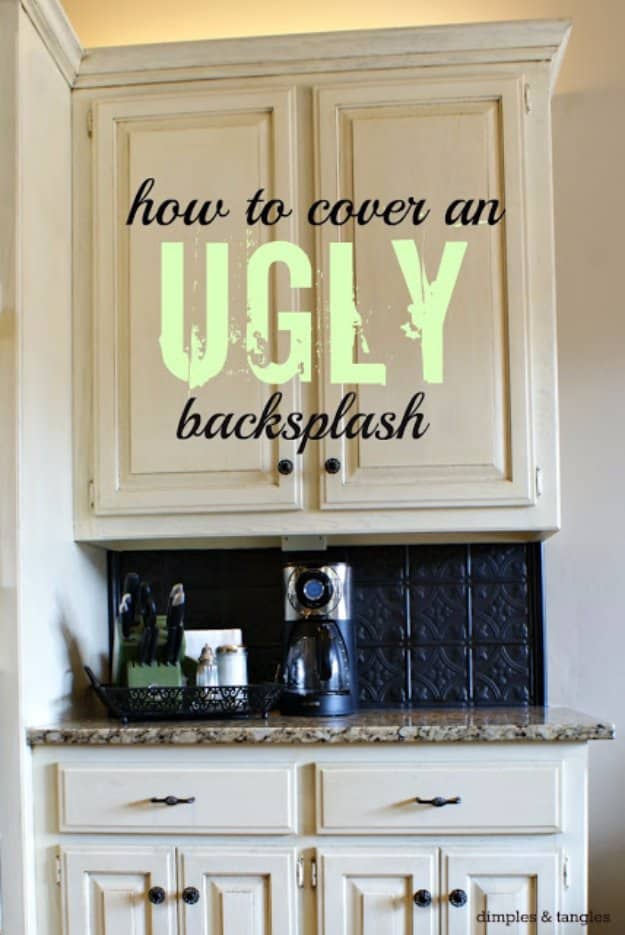
Covering an ugly kitchen backsplash doesn’t have to mean ripping out tile. These faux tin panels are lightweight plastic, cut with ordinary scissors and go right over the old tile with double sided tape, so they can come down later. Matching corner and edge trim hides the seams. When the original bronze finish clashed with new granite, a coat of Krylon Fusion for plastic and then oil rubbed bronze spray paint gave the panels a richer color. It’s a handy stopgap while saving up for a remodel.
Get the full tutorial at Dimples and Tangles.
5. $12 DIY Roman Shade Made From A Mini Blind
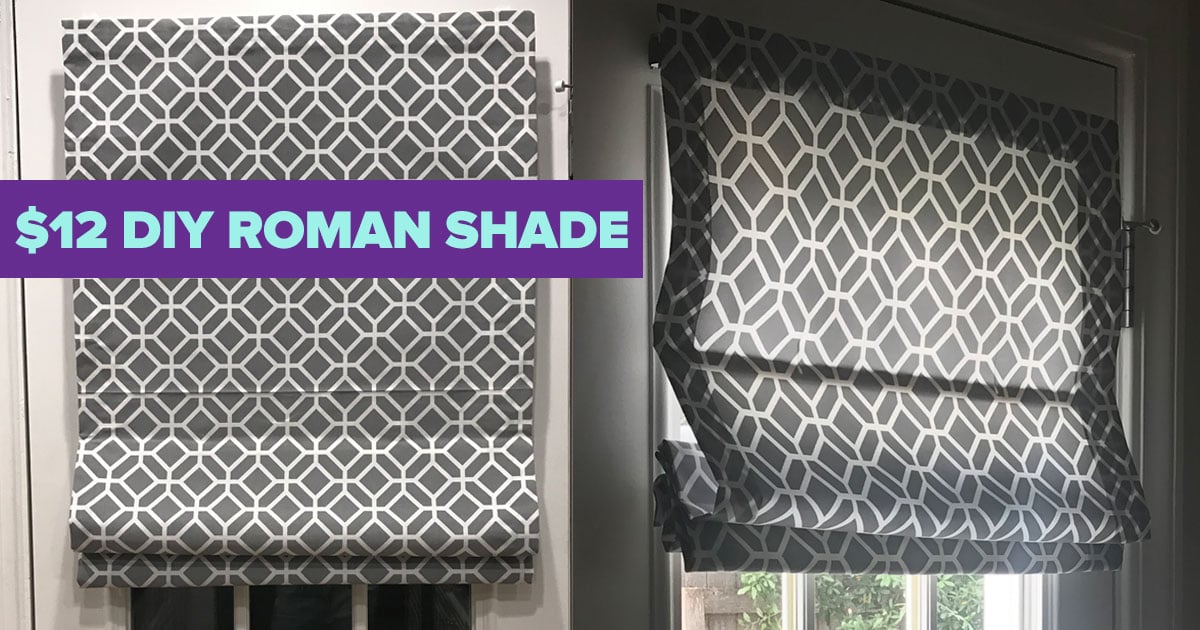
A Roman shade made from a cheap mini blind costs about $12 and needs no sewing at all. Measure the window and buy a blind that fits, then cut fabric with a 3 inch allowance on every side. Fold, iron and glue the edges down with fabric glue. Pull the pegs at the bottom rail, slide out the pull cords and tie two buttons on them so they can’t reel back in. Snip away the ladder cords, then glue the top rod, three evenly spaced slats and the bottom rod to the fabric.
Get the full tutorial at DIY JOY.
6. Fill Nail Holes
Wax filler sticks for nail holes are pricey for what they are, and a crayon does the exact same job. After installing trim, pick a crayon that matches the paint or stain and rub it firmly over each hole, just like coloring. Any smudge outside the hole wipes off with a dry rag. For bigger holes, warm the crayon tip with a lighter for a second so it softens and presses in better, then let it set before buffing. A big 96 count box covers almost any wood tone.
Get the full tutorial at The Gracious Wife.
7. Easy Faux Thick Baseboard Trick
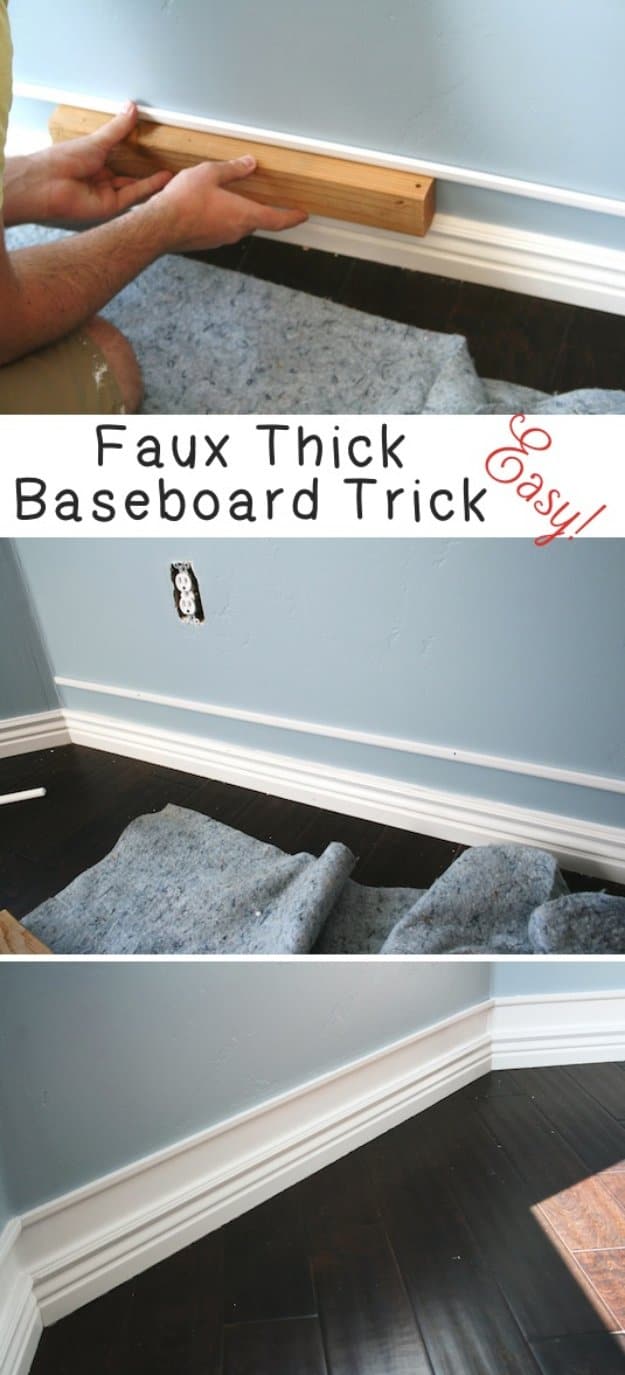
Skinny builder grade baseboards can look twice as tall with one extra strip of trim. Nail a thin piece of molding to the wall a few inches above the existing baseboard, using a scrap block of wood as a spacer so the gap stays even all the way around. Fill the nail holes and any gaps with spackle, then prime and paint the whole section, wall gap included, in semi gloss white. Everything reads as one chunky baseboard. The molding for one kitchen nook ran about $6.
Get the full tutorial at The House of Smiths.
8. Concrete Countertop DIY
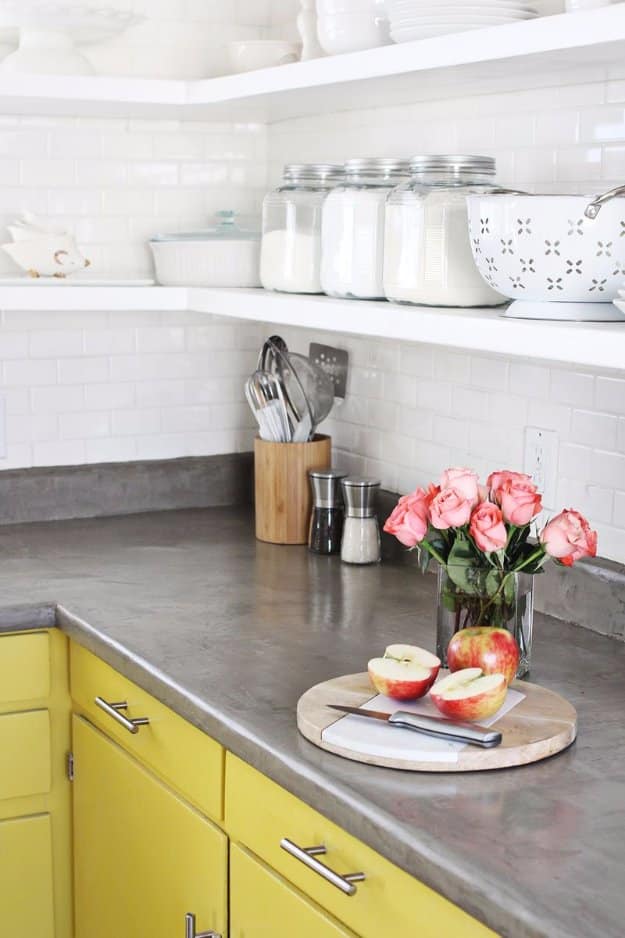
A concrete countertop DIY can go right over old laminate, no demolition needed. Rough up the laminate with coarse sandpaper so the cement grips, then mix Ardex Feather Finish at one part water to two parts dry mix. Small batches of about 1 cup water to 2 cups mix keep it from hardening before it’s spread. Smooth on thin coats with putty knives and a wide drywall trowel, almost like icing a cake, sanding between coats. Finish with a sealer and keep cutting boards handy.
Get the full tutorial at A Beautiful Mess.
9. Transform an Oak Banister
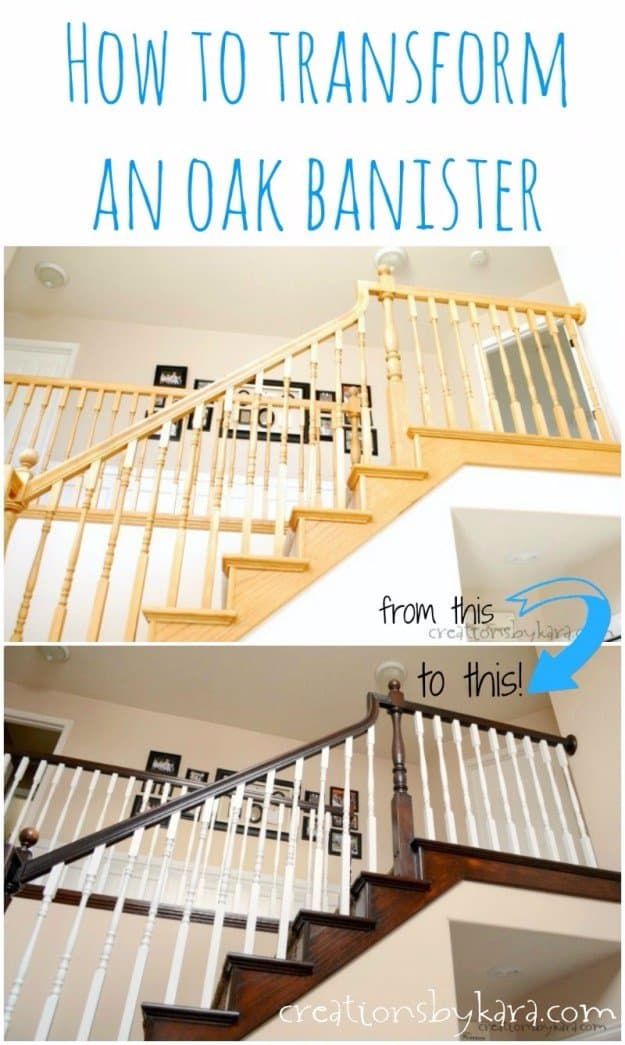
An orange oak banister is one of the fastest ways to date a house, and a dark gel stain fixes it without stripping. Lightly sand the rail with 150 and 220 grit to knock off the gloss, then vacuum and wipe it down with tack cloth. Tape off the spindles and rub on Java gel stain with an old sock or t-shirt, wearing gloves. Seal it with a gel topcoat. Then prime and paint the spindles white for that crisp two tone look.
Get the full tutorial at Creations by Kara.
10. Paint Your Linoleum Floor
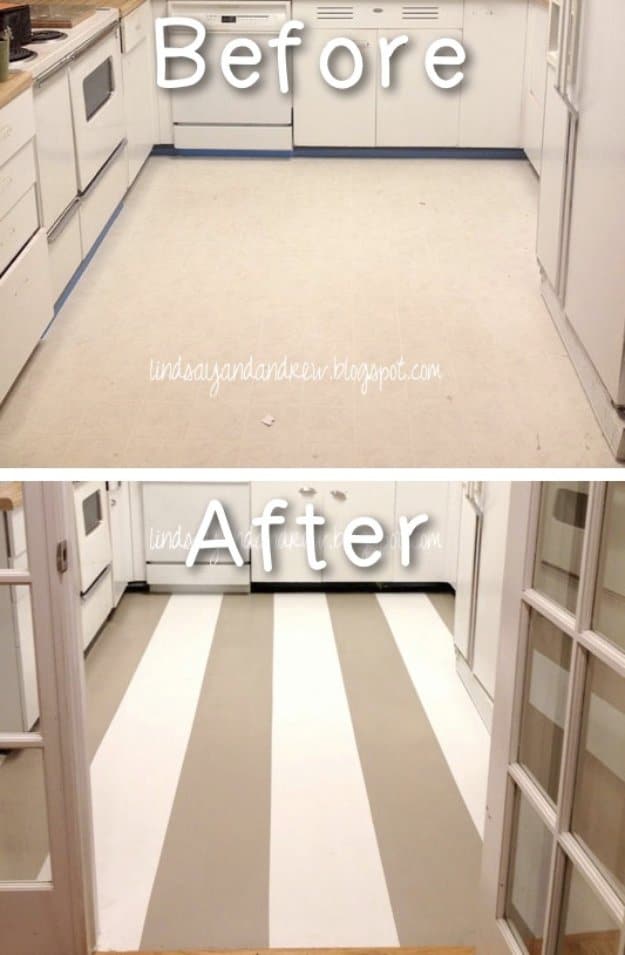
Painted linoleum is a cheap fix for a pink or yellowed kitchen floor, as long as the prep is right. Sand to take off the shine and patch any dings, then roll on an all surface bonding primer. Two coats of porch and patio floor paint go on next, and they need about three days to cure before regular use. For stripes, tape along the old linoleum lines with FrogTape and paint a second color like a warm taupe. The tape’s sealed edge keeps lines crisp.
Get the full tutorial at Lindsay & Drew.
11. Install a Dry Wall
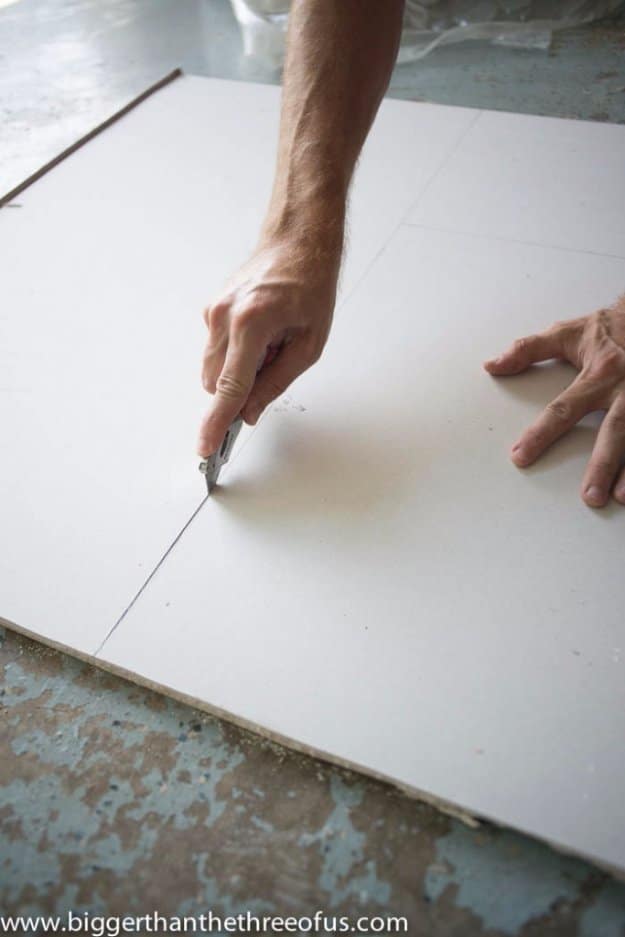
Hanging drywall for a small patch or a removed bulkhead is a doable weekend job. Check the thickness of the existing walls first, since 3/8 and 1/2 inch sheets are the most common. Measure the opening in several spots, sketch it on paper, then mark the sheet white side up. Score along a straight edge with a utility knife, snap it with a quick knee bump from the back and smooth the edge with a rasp. A dimpler bit sets every screw at the right depth.
Get the full tutorial at Bigger Than the Three of Us.
12. Mud a Dry Wall
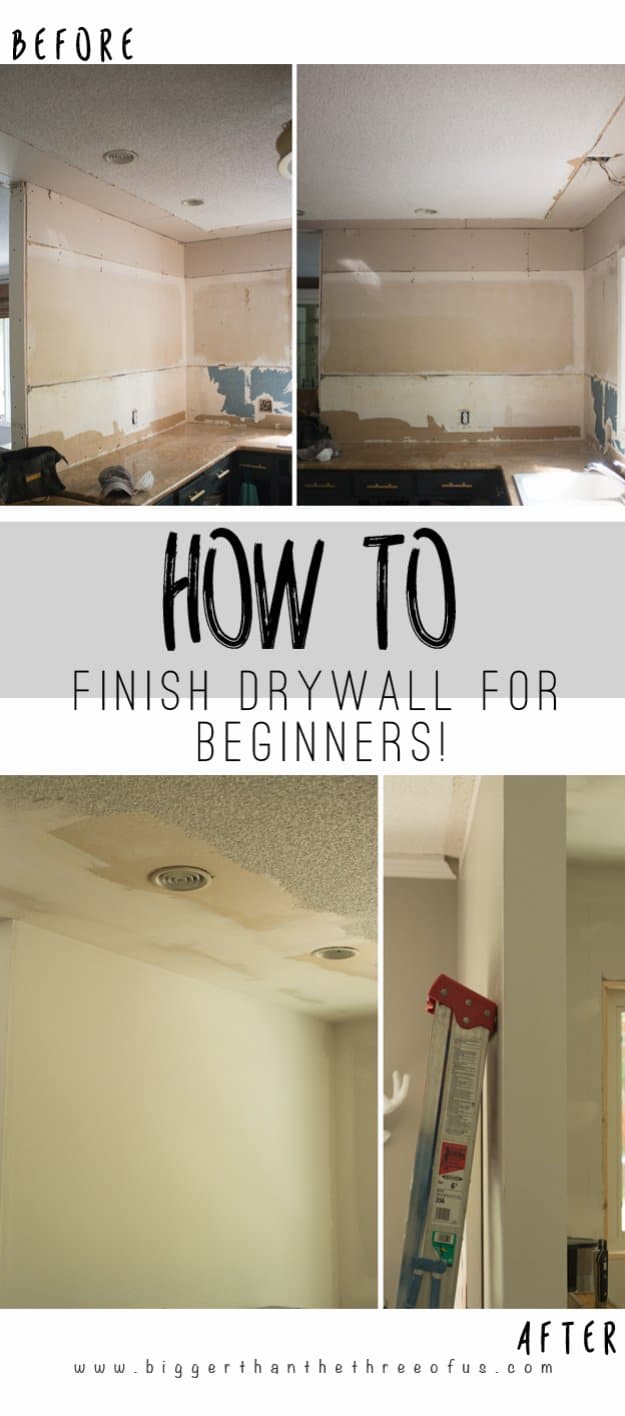
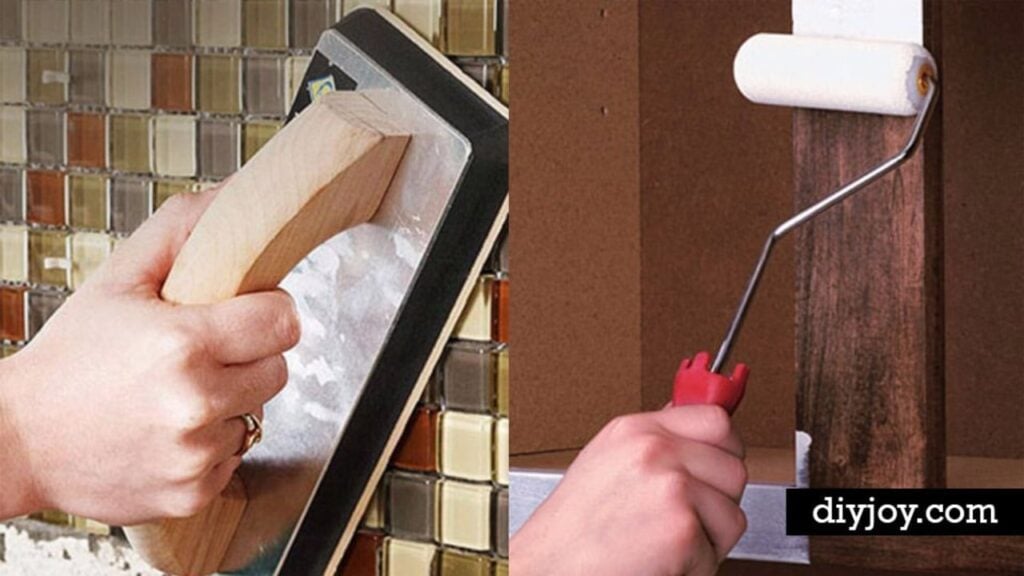
Mudding drywall is where a patch job becomes an invisible one. Spread joint compound over one seam, press paper tape into it and run a knife along the full length to set it firmly. Cover the tape with a thin second layer and smooth it out. Let it dry completely, sand and repeat with wider coats. An 8 inch and a 12 inch taping knife, a mud pan and a bucket of premixed compound, about $20, handle roughly 16 feet of seams.
Get the full tutorial at Bigger Than the Three of Us.
13. Refinish Wood Floors Like a Pro
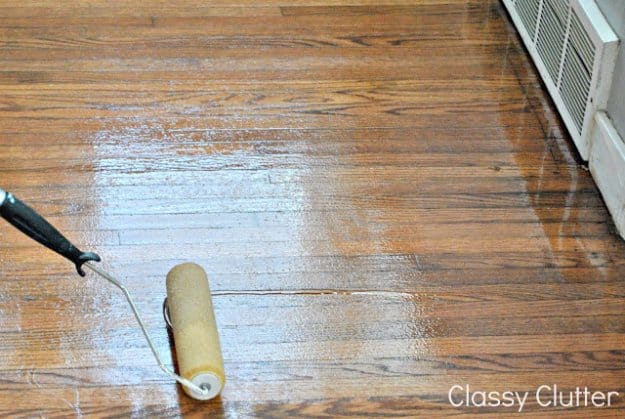
Refinishing wood floors hidden under old carpet can save thousands over new flooring. Once the floors are prepped, mop lightly with water to open the grain and let them dry for at least 30 minutes. Start in the far corner and scrub stain into the wood with a rag, buffing off the excess with a second dry rag. Wear rubber gloves. Seal with floor polyurethane using a smooth roller. Oil based smells strong, so open the windows; water based needs extra coats.
Get the full tutorial at Classy Clutter.
14. Frame a Builder Grade Bathroom Mirror
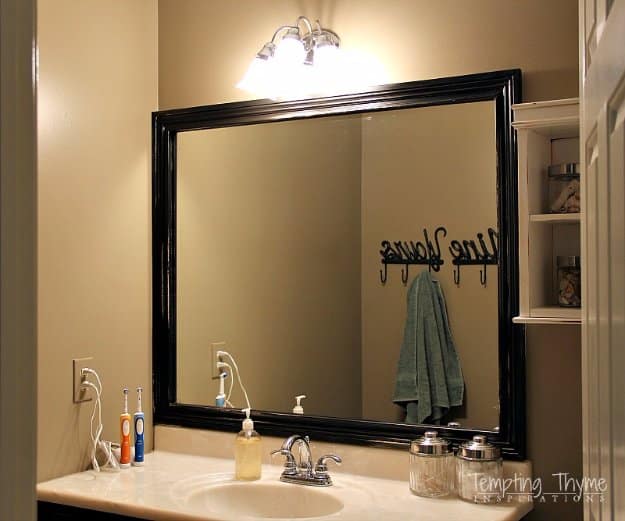
Framing a builder grade bathroom mirror with molding is easier with one lesson learned the hard way: hang it one side at a time, not as a finished frame. Buy primed MDF molding to skip a step, cut 45 degree miters and dry fit them on the floor. Paint the frame with two coats of black satin, and paint the inside edges too, because the mirror reflects them. Screw a backer board into the studs where the frame needs support, then attach each piece with Liquid Nails.
Get the full tutorial at Tempting Thyme.
15. Re-Grout Your Shower
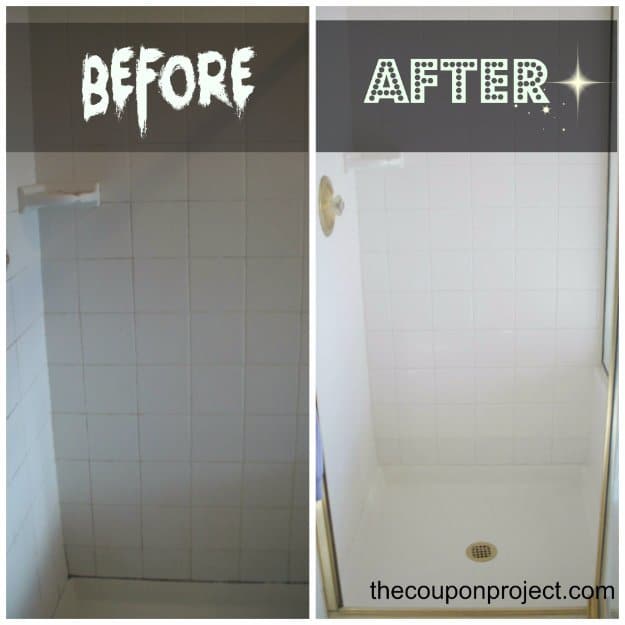
Re-grouting a shower costs under $50 and fixes the mildew no cleaner can reach. Slice out the old caulk with a razor, then scrape the grout lines down with a grout saw. Scrub everything with bleach water and let it dry a full day, since grout and caulk need dry surfaces. Mix a stain resistant epoxy grout like Spectralock and press it into the joints; a fingertip works in narrow lines. Wipe the tile with a damp sponge after 20 to 30 minutes, then recaulk.
Get the full tutorial at The Coupon Project.
16. Transform Countertop to Look Like Expensive Stone
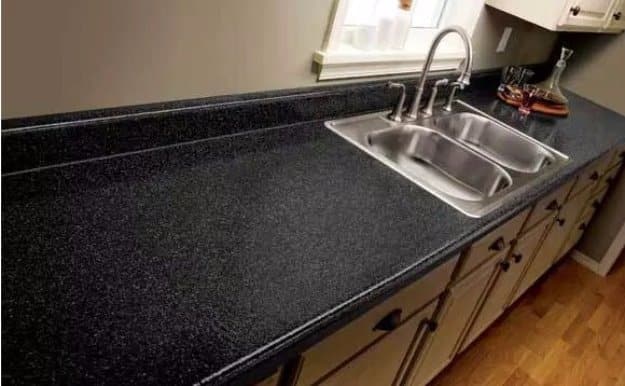
Countertop coating kits can make tired laminate look like speckled stone for far less than replacement, and without a contractor. This one is Rust-Oleum Countertop Transformations, a complete kit made with the DIYer in mind. Sand the old surface with the included diamond sanding tool, apply the adhesive base coat, then spread the decorative chips over it. Once dry, sand the chips smooth and seal with the clear topcoat. It works on bathroom vanities, bar tops and tables too. Up close it reads as a new surface rather than real granite.
Get the full tutorial at Charles & Hudson.
17. Paint Your Bathtub
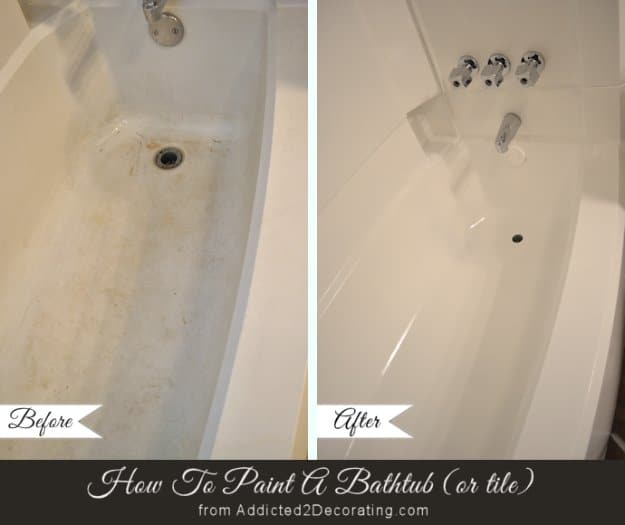
A stained bathtub can look brand new with a two part epoxy refinishing kit like Rust-Oleum Tub and Tile. Prep takes over an hour: wash with bleach water, scrub with Comet, then Lime Away and a scouring pad, and finally sand the whole tub. Cut in with a quality brush and roll the big areas with a 3/8 inch nap roller for a subtle texture. Two coats go on about an hour and a half apart, and the tub needs three days to cure. Wear a respirator, because the fumes are strong.
Get the full tutorial at Addicted 2 Decorating.
18. Newbie's Guide to Removing Baseboards
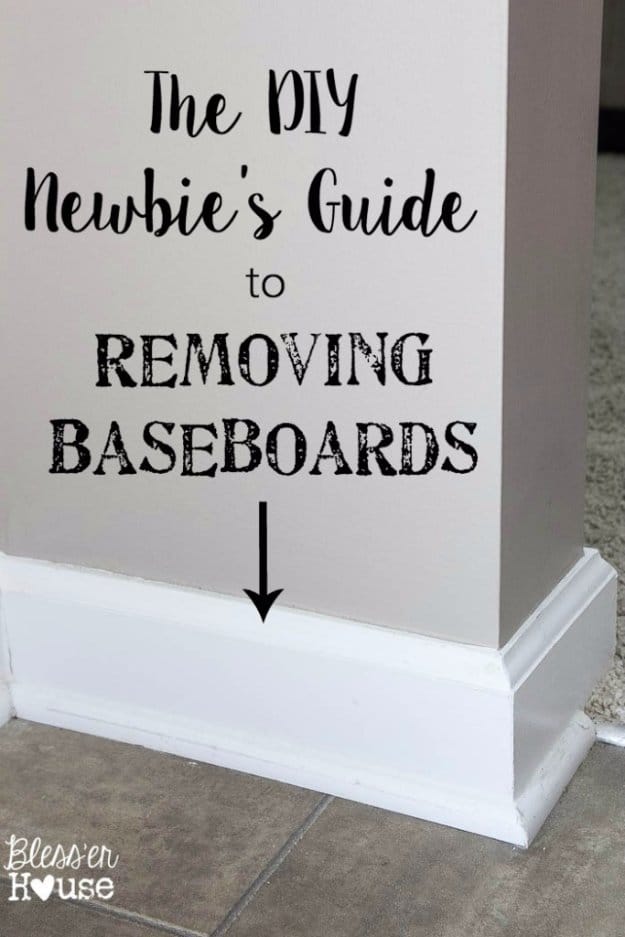
Removing baseboards without wrecking the drywall comes down to going slow. Score the caulk lines along the top and corners with a sharp box cutter first, so the paint doesn’t tear off with the trim. File the ends of a small pry bar sharp, tap it under the quarter round with a hammer and work it loose a little at a time. Then repeat on the baseboard. Mark the back of each piece with its spot on the wall if it’s going back up later.
Get the full tutorial at Bless'er House.
19. Refinish Kitchen Cabinets
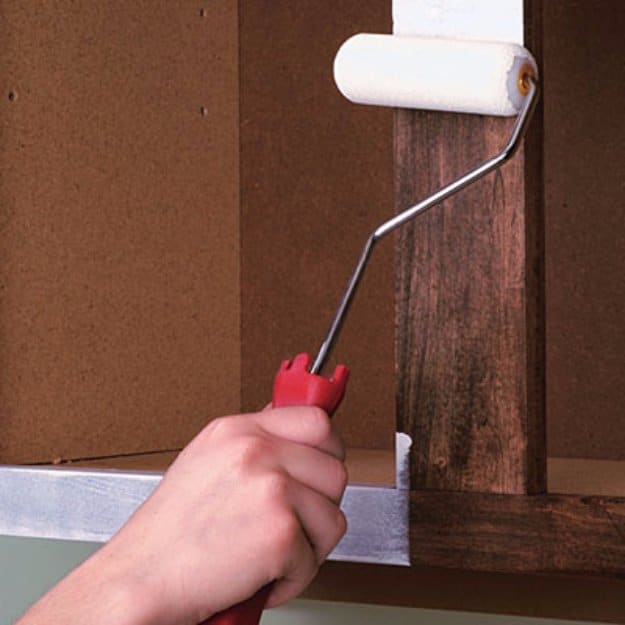
Refinishing kitchen cabinets with paint is mostly prep. Remove all the hardware and bag the hinges and pulls with a note for each set. Clean the cabinet faces with a TSP solution, fill old holes with wood putty if the new pulls need different spacing, and sand lightly with 150 grit. Prime, asking the store to tint the primer if the top coat isn’t white. Paint one side of the doors, let it dry overnight, sand with 220 grit and add a second coat.
Get the full tutorial at Sunset Magazine.
20. DIY Paneled Walls
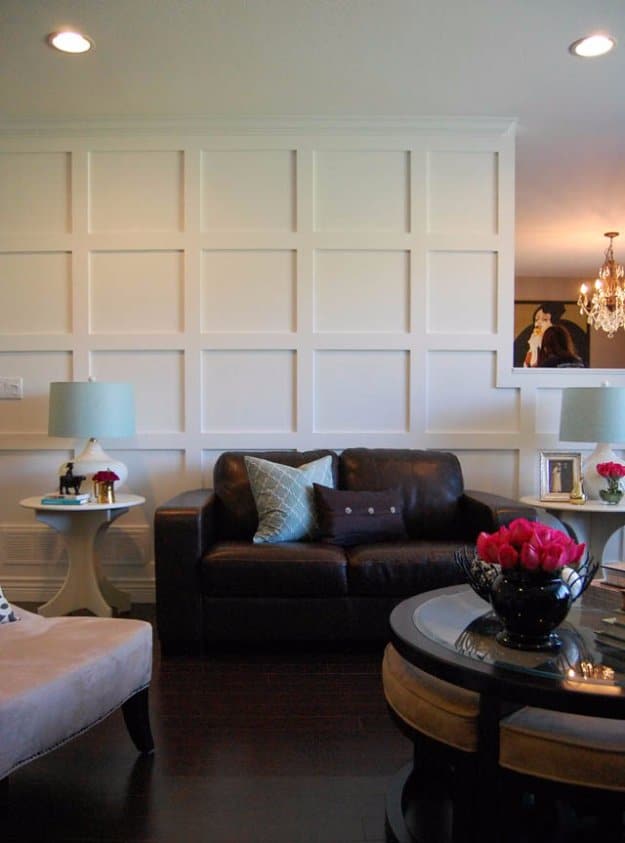
Grid paneled walls add the kind of architectural detail most suburban houses are missing. Pencil the layout right onto the wall first, using a long level or a laser level, and measure three times while checking the scale. Cut inexpensive MDF strips for the grid, with the longest pieces running vertically, and nail them up. Sand the joints, fill the nail holes, sand again and caulk where the boards meet the wall. A warm white paint over everything makes it look built in.
Get the full tutorial at Marcus Design.
21. Install Faux Wood Beams
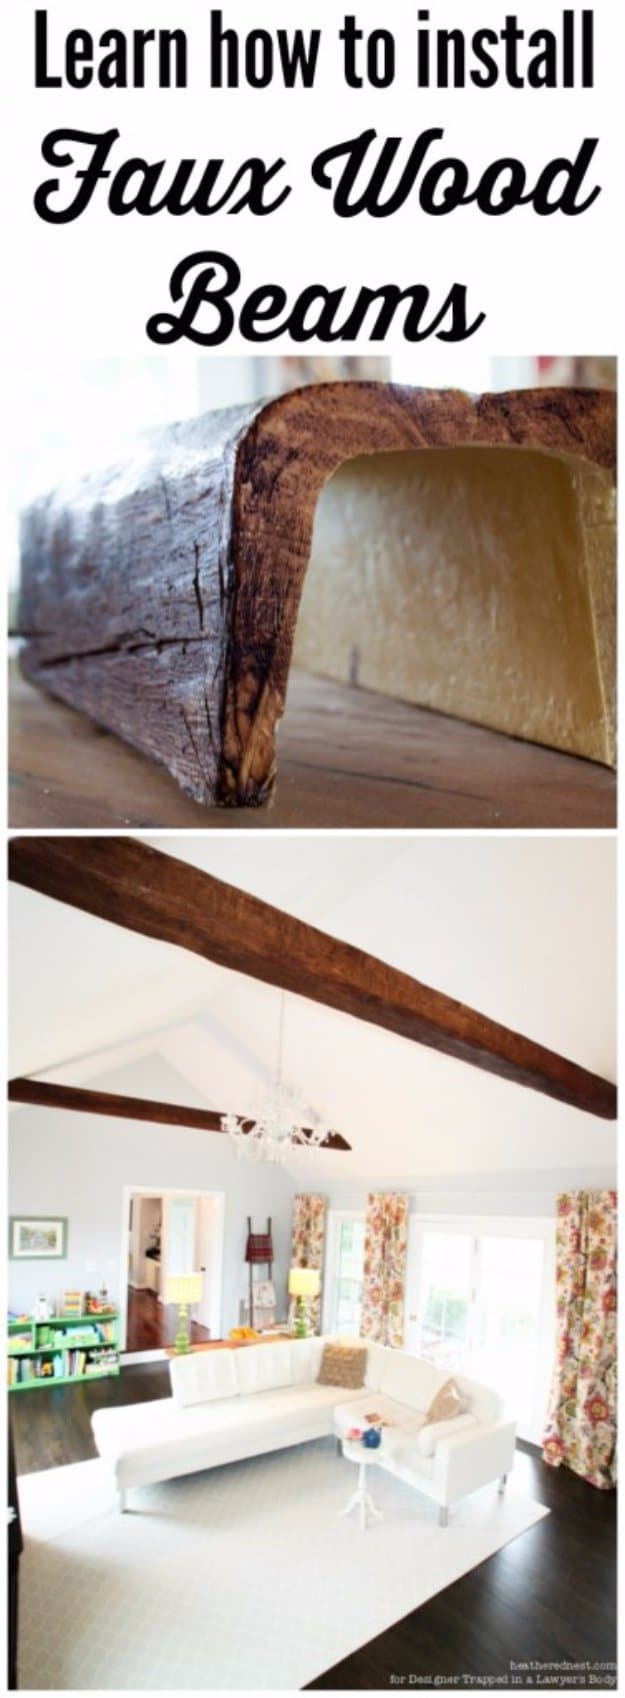
Faux wood beams cost about a fifth of real ones and weigh a fraction as much, so installing them is a job for two people, not a crew. Decide where the beams go first, since that’s honestly the hardest call. Mount joist hangers at each end, level them with a laser or line level and set two 2x4s screwed together into the hangers to span the room. The hollow U shaped beam lifts up over the 2x4s, with scrap spacers added for a snug fit, and screws in place.
Get the full tutorial at Kaleidoscope Living.